The gold standard for public WiFi security is two settings, not a VPN
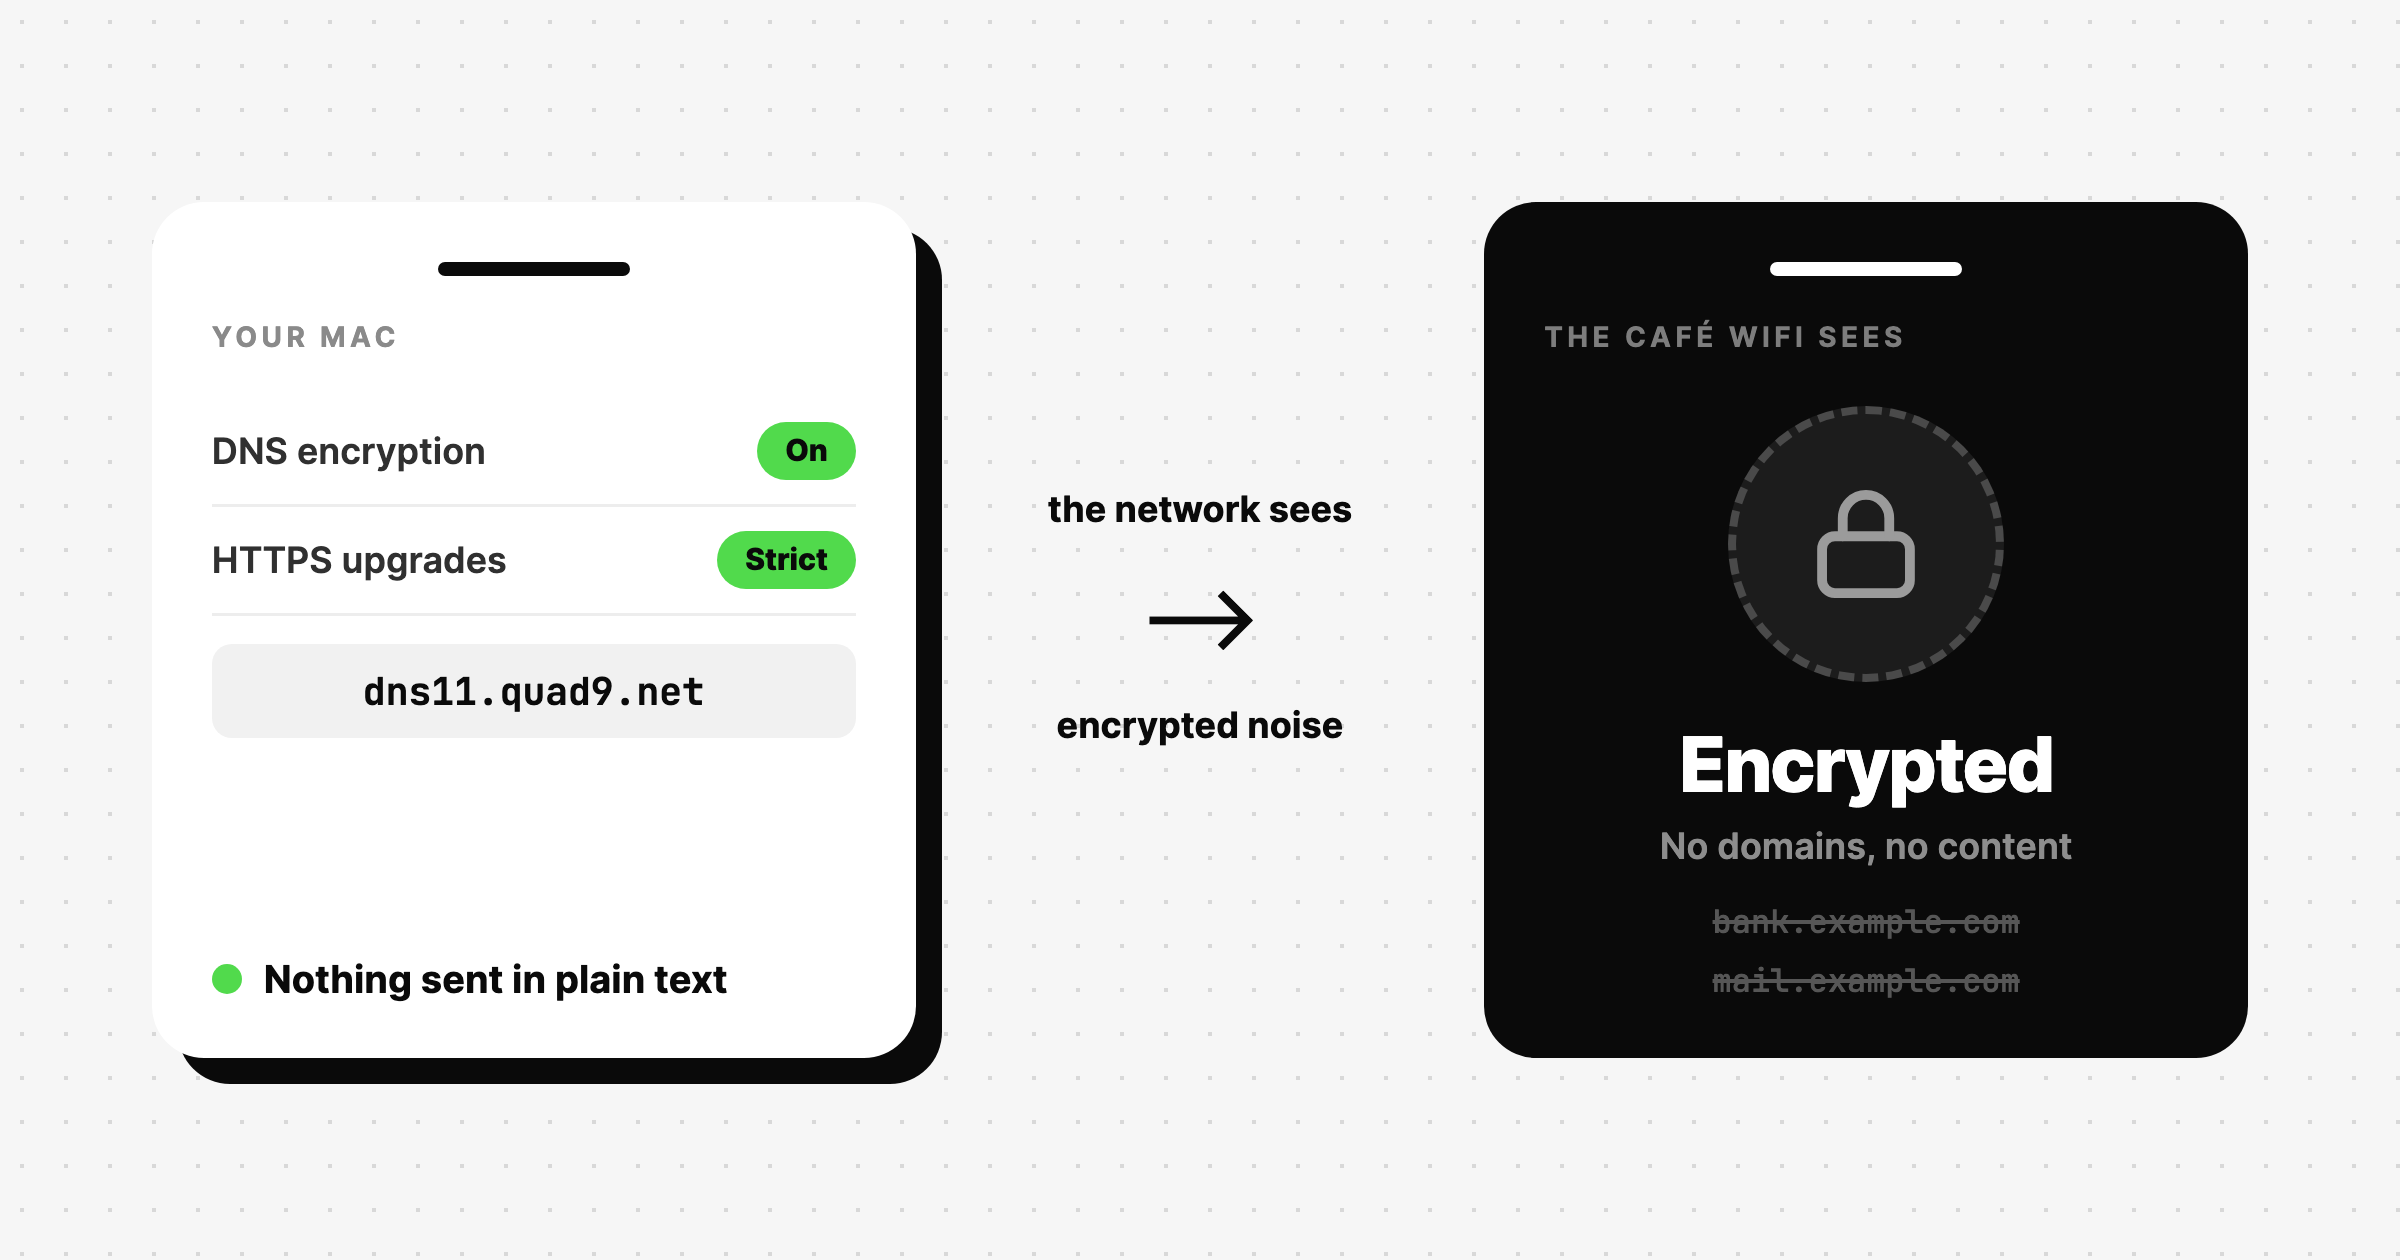
Every VPN ad sells the same scene: you, a coffee, an open network, and someone at the next table quietly reading your traffic. The fix they sell is a subscription. The fix you actually need is two settings on your Mac, and neither one costs anything per month.
The reason is that almost everything you send is already encrypted. HTTPS is the default across the web, so the café network sees ciphertext, not content. What stays exposed is smaller than the ads suggest, and it comes down to two things:
- Your DNS lookups. By default these go out in plain text, so whoever runs the network can see every domain you visit, and on an open network so can anyone else sitting on it.
- Anything a site still loads over plain http. One insecure asset on an otherwise secure page, and that request goes out readable.
Close those two gaps and there is very little left for a VPN to protect.
1. Encrypt your DNS with Quad9
I use Little Snitch, which is a genuinely great outbound firewall for macOS and has DNS encryption built into its settings.
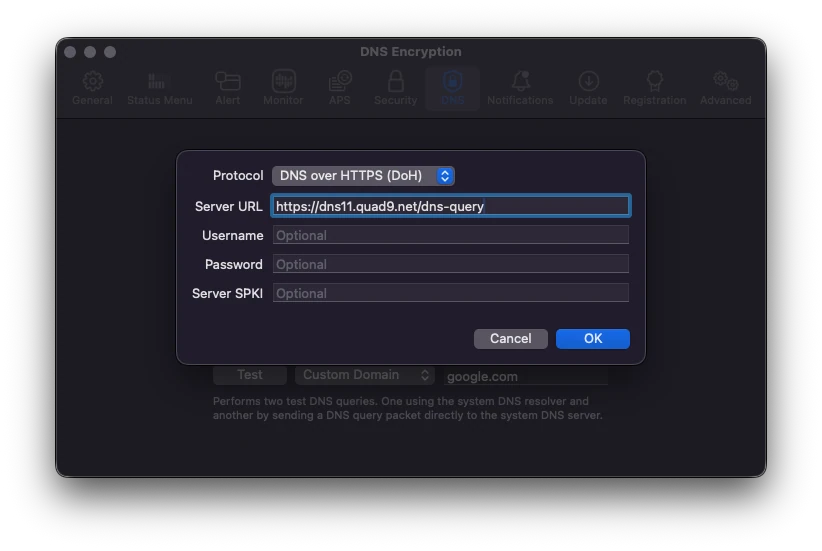
Turn DNS Encryption on, then set the provider dropdown to Custom and click Edit. Pick DNS over HTTPS (DoH) as the protocol and enter https://dns11.quad9.net/dns-query as the server URL.
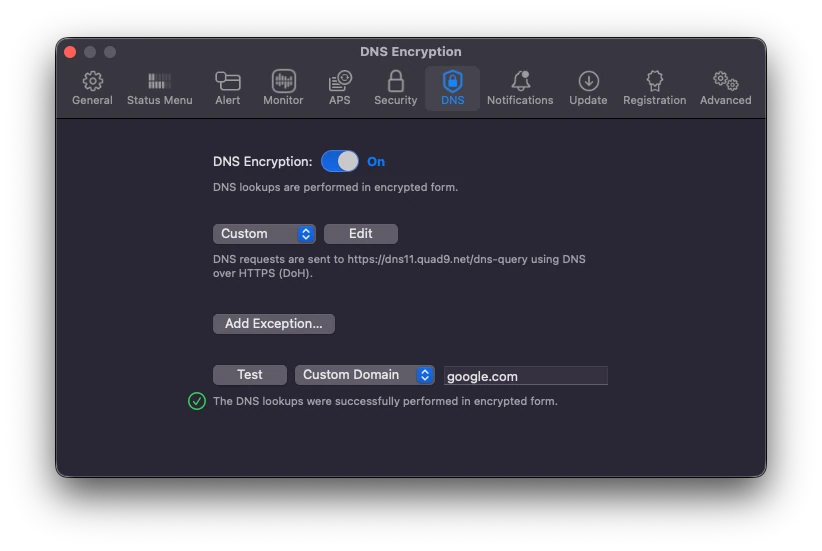
Back on the DNS pane you should see your custom server listed, and the Test button confirms that lookups are actually going out encrypted.
Not every Quad9 server is the same one
This is the part worth slowing down for, because the address you type decides what protection you actually get. Quad9 runs several services on different hostnames:
dns.quad9.net(9.9.9.9): malware blocking and DNSSEC validation, with no client subnet information passed upstream. The most private option.dns11.quad9.net(9.9.9.11): the same malware blocking and DNSSEC, plus EDNS Client Subnet. ECS forwards a truncated part of your IP address, your network prefix rather than your exact address, to the authoritative server, which lets CDNs route you to a nearer mirror. Slightly faster, slightly less private. This is the one I use.dns10.quad9.net(9.9.9.10): no malware blocking, no DNSSEC validation. Quad9 publishes it for testing whether their blocklist is the reason a domain will not load.
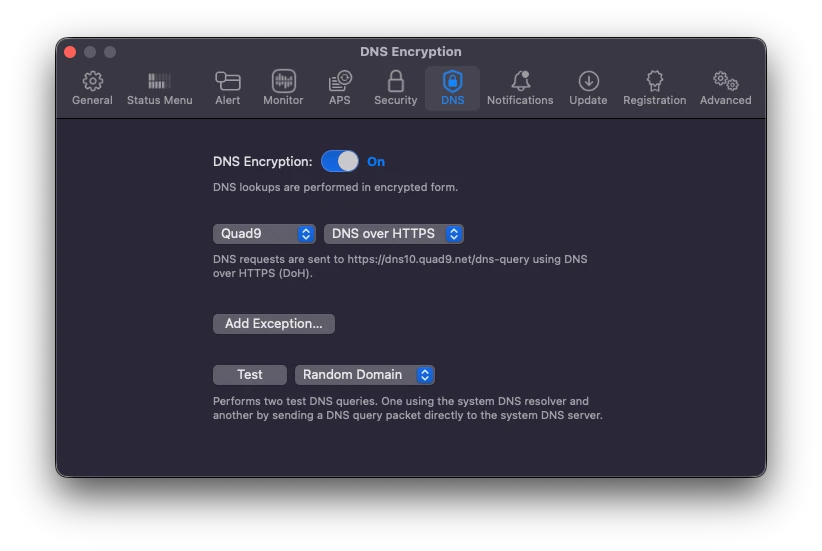
Here is the catch, and the reason for all the clicking above. Little Snitch’s built in Quad9 preset points at dns10, the unfiltered one. It used to use 9.9.9.9, and the 6.4 release in June 2026 switched it. So choosing “Quad9” from the dropdown gets you encryption and nothing else: no blocklist, no DNSSEC. Setting it to Custom is how you get the protection the name implies.
With dns11 in place, three things are true:
- Quad9 blocks malware at the DNS level. If a domain is a known phishing or malware host, it simply does not resolve. That is protection you get before anything reaches your browser.
- It is run by a Swiss non-profit foundation, not an ad company. The privacy policy is not a side effect of an advertising business model.
- DNS over HTTPS blends in. DoH sends your lookups over port 443 like any other web traffic, so they mix into everything else leaving your machine. DNS over TLS uses its own port, which makes DNS traffic identifiable as DNS traffic even when the contents are encrypted.
The practical effect: the café network no longer gets a list of every domain you visit.
You do not have to buy Little Snitch for this
Little Snitch is paid software, and I happily pay for it because of the firewall, not the DNS pane. If encrypted DNS is all you are after, Quad9 publishes macOS configuration profiles that set the same thing system-wide for free. Download the profile for the address you want, open it, and install it from System Settings.
It works just as well. You have to find the right profile yourself, pick the correct variant out of the list, and remember that the current profiles expire in January 2027 and need replacing. I like click and shoot, so I use the firewall I already own.
2. Set Browser HTTPS connections to Strict
Go to brave://settings/shields and set Upgrade connections to HTTPS to Strict.
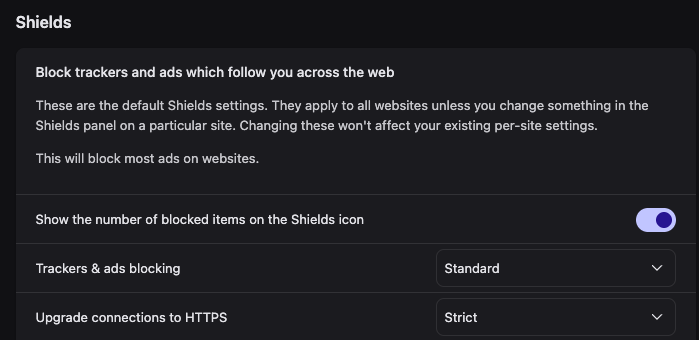
Standard mode upgrades what it can and quietly falls back to http when a site does not offer a secure version. Strict refuses to fall back. If something cannot be loaded over HTTPS, it does not load, and you get a warning instead of a silent plain text request. On a network you do not control, that is exactly the trade you want. You will hit an occasional old site that breaks, and you can allow it for that site alone.
Other Chromium browsers have the same feature under a different name. In Chrome it is Always use secure connections, under Privacy and security, Security, Advanced. In Edge it is Automatic HTTPS, under Privacy, search and services. Firefox is not Chromium but has its own version called HTTPS-Only Mode.
While you are in there, check the DNS box
Brave has its own secure DNS setting at brave://settings/security. It ships with Use secure DNS on and the provider set to OS default (when available), so there is usually nothing to change. Have a look anyway and leave it exactly like that.
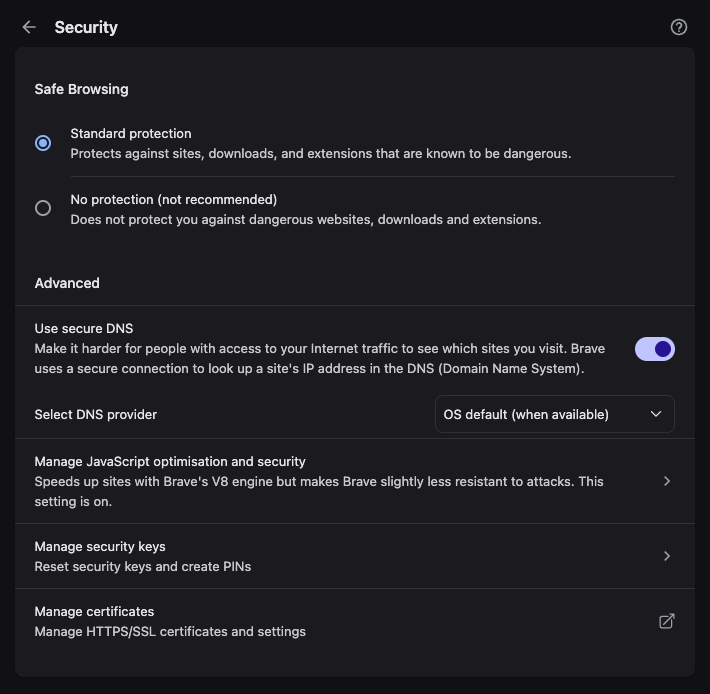
OS default is the setting you want, because it means Brave hands lookups to the system resolver and they go out through the encrypted DNS you set up in step 1. If you have ever picked a specific provider from that dropdown, put it back. A provider chosen inside Brave makes the browser resolve names on its own and go around your system resolver entirely, so you would end up with two different DNS paths instead of one.
What the network sees now
After these two settings, someone sharing the café WiFi with you gets: encrypted traffic, no readable DNS lookups, and no plain text fallbacks. Browsing, banking, logging into accounts, all covered.
Worth knowing where each piece applies. The encrypted DNS is system-wide, so every app on the Mac benefits. The strict HTTPS setting only covers Brave, so if you also use Safari or another browser, set the equivalent there too.
The network can still see the IP addresses you connect to, and in most cases the hostname in the TLS handshake. That is metadata, not content, and it is the one thing a VPN genuinely moves somewhere else. Which brings us to the honest question.
When would you still want a VPN?
For security on public WiFi, you are set. The remaining reasons to switch one on are not security reasons:
- Torrenting and P2P. Germany’s copyright enforcement watches public IP addresses in torrent swarms. Browser and DNS settings do nothing to hide your IP in a P2P network.
- Geo-blocking. If you need content locked to another country.
- Metadata anonymity. If you care that the network’s logs show you connected to a server IP belonging to your bank, a VPN shifts that visibility to the VPN provider instead. It moves the trust, it does not remove it.
For everything else, you already have what you need. Grab a coffee, open your Mac, and stop paying a subscription for a problem you have already solved.